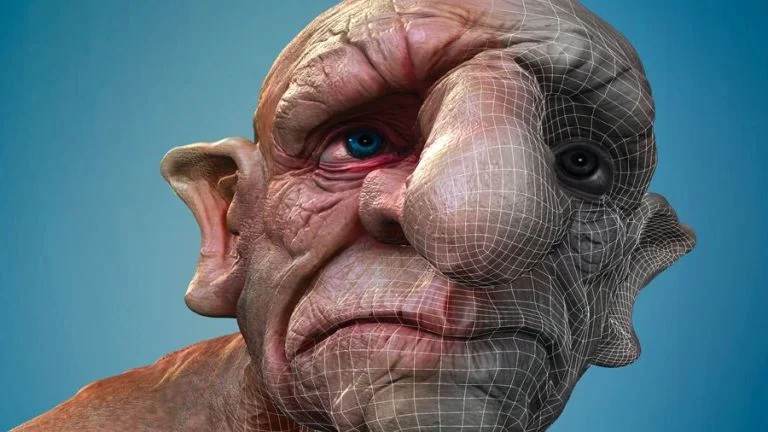
Retopology—the process of refining 3D models—is like sculpting with digital precision. Whether you’re a seasoned 3D artist or just dipping your toes into the world of 3D modeling, mastering retopology is essential for creating professional-quality assets. In this blog post, we’ll delve into the art of retopology, uncover expert tips, and explore the tools that can elevate your 3D workflow.
What is Retopology?
At its core, retopology involves taking an existing high-resolution 3D model (often a sculpt) and creating a new, optimized mesh over it. The goal? To achieve clean, efficient topology—well-organized vertices, edges, and faces. Why does this matter? Let’s find out.
Why Retopology Matters
- Animation-Ready Models: Clean topology ensures that your model deforms smoothly during animation. Whether it’s a character’s facial expressions or a creature’s movement, retopology makes it possible.
- Resource Optimization: High-poly models are resource-intensive. Retopologizing reduces polygon count while maintaining visual quality, making rendering faster and more efficient.
- Game Assets: For real-time applications like video games, low-poly models with optimized topology improve performance without sacrificing visual appeal.
Expert Tips and Tricks
- Geometry Takes Labor to Modify (Simplicity Is Key):
- Start with a basic, low-poly mesh. Every additional vertex adds complexity.
- Avoid excessive edge loops or sculpting until you’ve nailed down the overall shape.
- Consider Your Endgame:
- Are you creating a model for a static render, animation, or a video game?
- Optimize differently based on your project’s requirements.
- If It Moves, It Should Look Like It:
- Prioritize areas like the face for detailed retopology.
- Eyes, mouth, and other expressive features need extra attention.
- Topology Tools and Workflow:
- Use retopology tools available in your 3D software.
- Plan edge loops strategically for natural deformation.
- Check for Artifacts:
- Inspect your retopologized mesh for issues like pinching or overlapping vertices.
- Clean up any artifacts.
- UV Unwrapping:
- Prepare your model for texturing by unwrapping UVs.
- Minimize distortion for better texture mapping.
- Test Rigging and Deformation:
- Rig your model and ensure it moves naturally.
- Adjust as needed.
Practice Makes Perfect
Retopology is both technical and artistic. As you gain experience, you’ll develop an eye for clean topology. So keep refining those models, and soon you’ll master the art of retopology!


